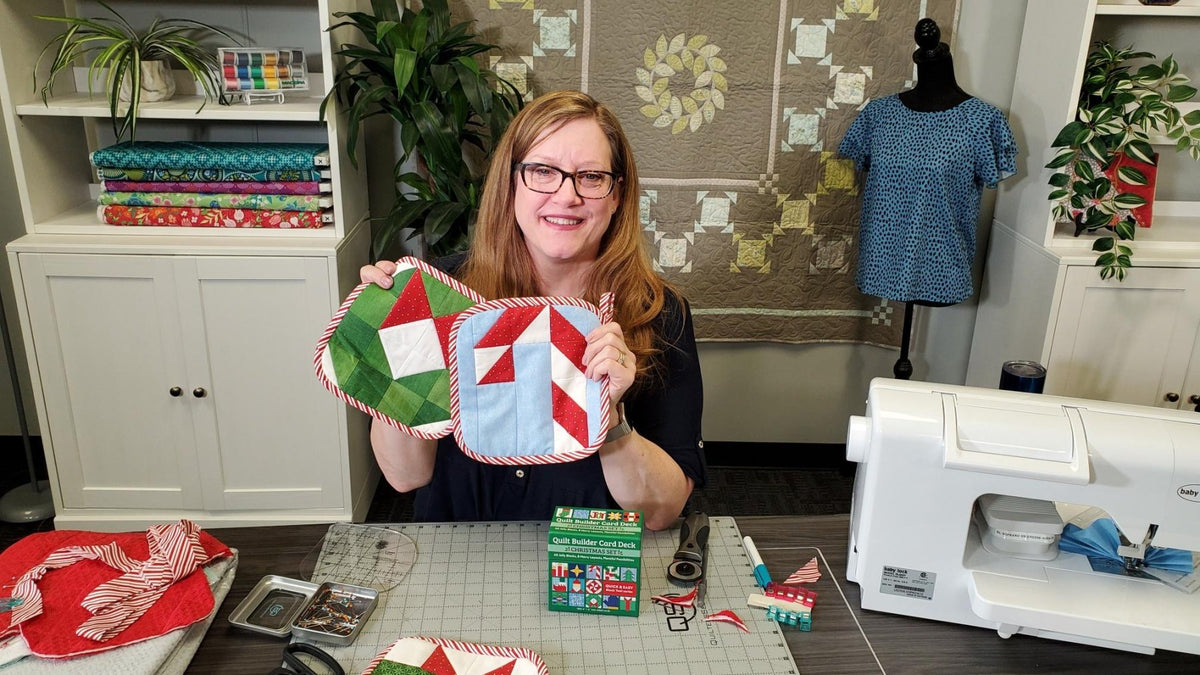
Quick Tips for Making Pot Holders
|
Time to read 4 min
|
Time to read 4 min
Hi everyone! Reva from Quality Sewing and Vacuum here. Today, I'm sharing an easy and delightful project making pot holders. Whether you're starting with plain fabric, orphan quilt blocks, or creating new quilt blocks, these tips will guide you through creating personalized, practical gifts. Let’s dive into the process step-by-step!
You can find all these project tools and materials at QualitySewing.com to get started on your sewing project with ease. Once you've gathered everything you need, you're ready to jump into the next steps and start creating your beautiful DIY pot holders!
You can use plain fabric or quilt blocks. For this project, I used 8x8-inch quilt blocks, which I find to be the perfect size for DIY pot holders. Choose coordinating fabric for the back of the pot holder and lay it down wrong side up. Homemade pot holders give you the freedom to mix and match colors and patterns, making each one unique and special.
Stack your layers: bottom fabric (wrong side up), hot/cold barrier fleece (fleecy side down), and batting on top. Use a fabric glue pen or pins to secure the layers before quilting. The glue pen dries quickly and prevents pins from poking you as you sew, making the process smoother and more enjoyable when creating your homemade pot holders.
Trim your pot holder to a clean 8x8-inch square using a rotary cutter and ruler. You can choose to keep the corners square or round them off for easier binding. Rounded corners add a decorative element and make binding easier, which is perfect for making pot holders quickly.
Quilt the layers as desired. Simple straight or cross-hatch stitching works well for pot holders. Sew close to the edges (within ¼ inch) to keep the layers intact and ready for trimming. This quilting step helps ensure the DIY pot holders maintain their structure and durability over time.
Use bias binding for the edges. Bias binding stretches around corners more easily than straight binding and adds a decorative sense to your homemade pot holders. Start sewing the binding at the bottom, leaving a tail for easy joining later. Sew around the edges, carefully navigating corners using a pivoting presser foot if needed.
When you return to the starting point, overlap the binding ends for a clean finish. Fold the starting tail under at an angle to conceal it beneath the overlap. Continue sewing, ensuring the binding is secure. This gives your DIY pot holders a professional finish that’s both functional and attractive.
Turn the binding over to the back side of the pot holder and secure it with glue or pins. Run a line of glue along the seam, fold the binding over, and press it down. Make sure the binding covers the seam line to ensure a neat finish when stitched in place. This step is key for creating homemade pot holders that look polished.
Sew along the front seam line ("stitch in the ditch") to secure the binding on the back. This technique makes the stitch nearly invisible and gives a professional look to your DIY pot holders.
Additional Ideas and Tips
Pot holders are practical, thoughtful gifts that everyone will appreciate. With these simple steps and materials, you can create homemade pot holders that are both beautiful and functional. Enjoy experimenting with different fabrics, colors, and patterns to make your DIY pot holders truly one-of-a-kind.
Happy Sewing,
~Reva
What is the best fabric to use for pot holders?
The best fabrics are 100% cotton or other heat-resistant materials. Quilting cotton works well for the top layer, and coordinating fabric can be used for the backing.
What kind of batting should I use for pot holders?
Use heat-resistant batting, such as cotton batting or specialized materials like Insul-Bright or Floriani’s hot/cold barrier fleece for added heat protection.
What size should I make my pot holders?
An 8x8-inch square is a common size, but you can adjust based on your preferences and needs.
Can I use synthetic fabrics for pot holders?
It’s best to avoid synthetic fabrics as they can melt or catch fire when exposed to high heat. Stick to natural fibers like cotton for safety.
How can I add extra heat protection to my pot holders?
Layer a heat-resistant material, such as hot/cold barrier fleece, between the batting and the fabric layers to improve heat protection.
Do I need to use bias binding for the edges?
While it’s not mandatory, using bias binding helps when sewing around curves and provides a cleaner, more flexible finish.


